During this lab, I spent time setting up the Arduino IDE to communicate with the Artmeis Nano. Then, I ran some of the demos to get familiar with programming on the Nano.
Prelab
I installed the latest Arduino IDE, and installed the linux CH340 driver. For my linux kernel, version 6.12, you will need to change the following include:
- #include <asm/unaligned.h>
+ #include <linux/unaligned.h>
Next, following these instructions, I installed the libraries needed to get Arduino to work with the Artemis Nano. Lastly, I installed
Task 1: Blink it
I ran the Blink example included with Arduino, and confirmed that the baud rate was set correctly.
Task 2: Serial
To verify that the UART communication between the board and computer was working fine, I ran Apollo3/Example4_Serial. After opening up serial monitor,
type a message into the input box and you should see it echoed back to you from the board.
Task 3: Analog Read
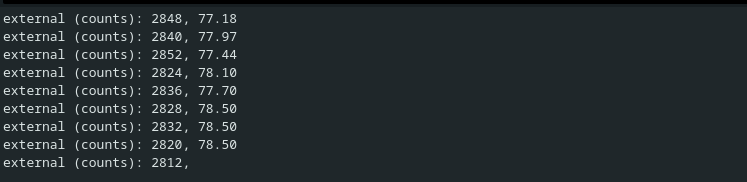
Another Apollo3 example is Analog Read that receives and outputs temperature data from the Artemis Nano. To get the actual farenheit temperature instead of the raw sensor values, modify the following line:
- Serial.printf("temp (counts): %d, vcc/3 (counts): %d, vss (counts): %d, time (ms) %d\n", temp_raw, vcc_3, vss, millis());
+ Serial.println(temp_f);
Hold the chip between your fingers, and you should see the onboard temperature slowly tick up via the serial monitor. Mine went from 75F to 78F.
Task 4: Microphone
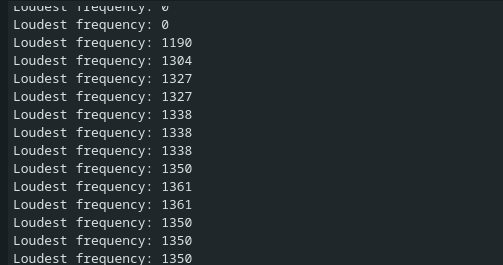
The last example I tried was PDM/Example1_MicrophoneOutput that uses the Nano’s microphone to output the highest frequency it heared.
Talking lead to a frequency of about 150 Hz, and when I whistled I saw it jump to about 1350 Hz. These values seem consistent with what I saw on my phone.
I did see it output frequencies around 22 kHz which I presume was interference from some device that I could not hear.